How to Fix a Leaking Sink: A Comprehensive DIY Guide
Is that persistent drip-drip-drip driving you crazy and costing you money? A leaking sink is a common household problem, but thankfully, most leaks are relatively easy to fix yourself. This comprehensive guide provides you with everything you need to know about how to fix a leaking sink, saving you time, money, and the hassle of calling a plumber for a simple repair. We’ll walk you through identifying the source of the leak, gathering the necessary tools and materials, and step-by-step instructions for various types of sink leaks. Our goal is to empower you with the knowledge and confidence to tackle this common plumbing issue, ensuring a watertight sink and a quieter home. We’ve compiled insights from years of hands-on experience and expert consultations to provide you with the most reliable and effective solutions.
Understanding the Anatomy of a Leaking Sink
Before diving into the repair process, it’s crucial to understand the different components of your sink and where leaks commonly occur. This knowledge will help you pinpoint the exact source of the problem and choose the appropriate fix.
Common Sink Components:
* **Faucet:** The fixture that controls the water flow. Leaks can occur around the base, handle, or spout.
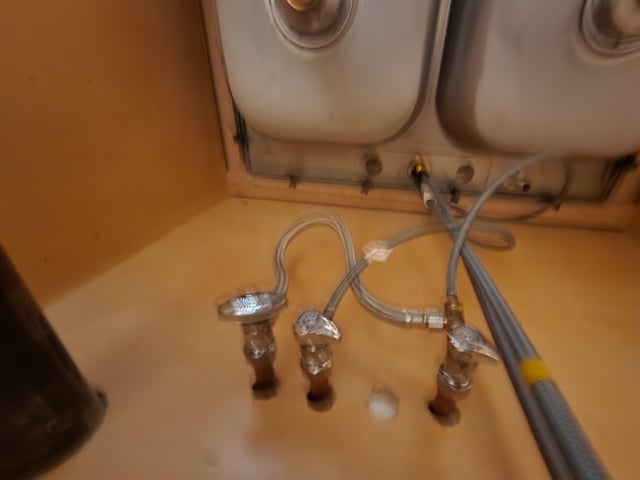
* **Supply Lines:** Flexible tubes that connect the shut-off valves to the faucet. Leaks often happen at the connection points.
* **Shut-Off Valves:** These valves control the water supply to the sink. Leaks can originate from the valve stem or connections.
* **Sink Basin:** The bowl-shaped part of the sink that holds water. Leaks are rare here but can occur if the sink is cracked or improperly sealed.
* **Drain Assembly:** The network of pipes below the sink that carries wastewater away. Common leak points include the drain flange, tailpiece, P-trap, and drainpipe connections.
* **P-Trap:** The U-shaped section of the drainpipe that traps debris and prevents sewer gases from entering your home. It’s a frequent source of leaks due to loose connections or corrosion.
Common Leak Locations and Their Causes:
* **Faucet Base:** Worn-out O-rings or loose connections.
* **Faucet Handles:** Damaged cartridges or valve seats.
* **Faucet Spout:** Corroded spout O-rings or seals.
* **Supply Line Connections:** Loose fittings, damaged compression rings, or corroded supply lines.
* **Drain Flange:** Deteriorated plumber’s putty or loose locknut.
* **Tailpiece:** Loose slip nuts or worn-out washers.
* **P-Trap Connections:** Loose slip nuts or damaged washers.
* **Drainpipe Connections:** Loose connections or corroded pipes.
Essential Tools and Materials for Fixing a Leaking Sink
Having the right tools and materials on hand will make the repair process much smoother and more efficient. Here’s a list of essential items:
* **Basin Wrench:** Used to loosen and tighten nuts in tight spaces, especially on faucets and drain assemblies.
* **Adjustable Wrench:** Versatile wrench for various nuts and bolts.
* **Pliers:** For gripping and turning small parts.
* **Screwdrivers (Phillips and Flathead):** For removing and tightening screws on the faucet and drain assembly.
* **Plumber’s Putty:** Used to seal the drain flange to the sink basin.
* **Plumber’s Tape (Teflon Tape):** Used to seal threaded connections on pipes and fittings.
* **New Washers and O-Rings:** Replacement parts for worn-out or damaged seals.
* **Replacement Supply Lines:** If the existing supply lines are corroded or damaged.
* **Bucket:** To catch water and prevent spills.
* **Towels or Rags:** To clean up spills and dry surfaces.
* **Penetrating Oil:** To loosen corroded nuts and bolts (optional).
* **Safety Glasses:** To protect your eyes from debris.
* **Gloves:** To protect your hands from dirt and grime.
Before starting any repair, always turn off the water supply to the sink using the shut-off valves located under the sink. If the shut-off valves are not working, you may need to turn off the main water supply to your house.
Step-by-Step Guide: How to Fix Common Sink Leaks
Now, let’s get into the specific steps for fixing some of the most common sink leaks. Remember to take your time, work carefully, and don’t hesitate to consult online resources or a professional plumber if you encounter any difficulties.
1. Fixing a Leaking Faucet Base
A leak at the base of the faucet often indicates a problem with the O-rings or the faucet connection to the sink. Here’s how to address it:
* **Turn off the water supply:** Locate the shut-off valves under the sink and turn them clockwise to shut off the water.
* **Dry the area around the faucet base:** Use a towel to thoroughly dry the area.
* **Tighten the faucet mounting nuts:** Use a basin wrench to tighten the nuts that secure the faucet to the sink. Be careful not to overtighten, as this could damage the faucet or the sink.
* **If tightening doesn’t work, replace the O-rings:**
* Disconnect the water supply lines from the faucet.
* Remove the faucet from the sink.
* Locate the O-rings at the base of the faucet.
* Remove the old O-rings and replace them with new ones of the same size.
* Reinstall the faucet and reconnect the water supply lines.
2. Fixing a Leaking Faucet Handle
Leaks around the faucet handle usually indicate a problem with the cartridge or valve seat inside the faucet. Here’s how to fix it:
* **Turn off the water supply:** Locate the shut-off valves under the sink and turn them clockwise to shut off the water.
* **Remove the faucet handle:** Depending on the faucet model, you may need to remove a decorative cap or loosen a set screw to remove the handle.
* **Remove the cartridge or valve stem:** Once the handle is removed, you’ll see the cartridge or valve stem. Use a wrench to loosen and remove it.
* **Inspect the cartridge or valve stem:** Look for signs of damage or wear, such as cracks, corrosion, or worn-out rubber seals.
* **Replace the cartridge or valve stem:** Purchase a new cartridge or valve stem that is compatible with your faucet model. Install the new part and reassemble the faucet.
3. Fixing a Leaking Supply Line
Leaks in the supply lines are often caused by loose connections or damaged supply lines. Here’s how to address them:
* **Turn off the water supply:** Locate the shut-off valves under the sink and turn them clockwise to shut off the water.
* **Tighten the connections:** Use an adjustable wrench to tighten the connections at both ends of the supply line. Be careful not to overtighten.
* **If tightening doesn’t work, replace the supply line:**
* Disconnect the old supply line from the shut-off valve and the faucet.
* Purchase a new supply line of the same length and diameter.
* Apply plumber’s tape to the threads of the shut-off valve and the faucet connection.
* Connect the new supply line to the shut-off valve and the faucet, tightening the connections securely.
4. Fixing a Leaking Drain Flange
A leak around the drain flange is often caused by deteriorated plumber’s putty or a loose locknut. Here’s how to fix it:
* **Remove the drain stopper:** Remove the drain stopper from the sink.
* **Loosen the locknut:** Use a basin wrench to loosen the locknut that holds the drain flange in place.
* **Remove the drain flange:** Carefully remove the drain flange from the sink basin.
* **Clean the drain flange and sink basin:** Remove any old plumber’s putty from the drain flange and the sink basin.
* **Apply new plumber’s putty:** Roll a rope of plumber’s putty and press it around the underside of the drain flange.
* **Reinstall the drain flange:** Insert the drain flange into the sink basin and press it firmly into the plumber’s putty.
* **Tighten the locknut:** Tighten the locknut using a basin wrench.
* **Remove any excess plumber’s putty:** Remove any excess plumber’s putty that squeezes out from under the drain flange.
5. Fixing Leaks in the P-Trap and Drainpipe
Leaks in the P-trap and drainpipe are frequently due to loose connections or corroded pipes. Here’s a breakdown of how to address these issues effectively:
* **Preparation is Key:** Begin by placing a bucket directly beneath the P-trap to capture any water that may spill during the repair process. This will prevent water damage and keep your workspace clean.
* **Assessing the Connections:** Carefully inspect all slip nuts and connections within the P-trap and drainpipe assembly. Look for signs of corrosion, cracks, or general wear and tear. These are common indicators of potential leak sources.
* **Tightening Loose Connections:** Using channel-lock pliers or an adjustable wrench, gently tighten any loose slip nuts. It’s crucial to avoid overtightening, as this can damage the plastic or metal and potentially worsen the leak. A snug fit is all that’s needed.
* **Disassembling the P-Trap:** If tightening the connections doesn’t resolve the leak, it may be necessary to disassemble the P-trap. Carefully loosen the slip nuts and detach the P-trap from the drainpipes. Be prepared for some water to spill out during this process.
* **Inspecting and Cleaning Components:** Once disassembled, thoroughly inspect all components of the P-trap and drainpipe. Clean away any debris, sediment, or corrosion buildup. Check the washers inside the slip nuts; these often become brittle or cracked over time and can contribute to leaks.
* **Replacing Washers:** If the washers appear damaged or worn, replace them with new ones of the correct size. This is a simple and inexpensive step that can significantly improve the seal and prevent future leaks.
* **Reassembling the P-Trap:** Carefully reassemble the P-trap, ensuring that all connections are aligned correctly. Tighten the slip nuts securely, but again, avoid overtightening.
* **Testing for Leaks:** After reassembly, slowly turn the water supply back on and carefully monitor the P-trap and drainpipe for any signs of leaks. If you observe any leaks, double-check the connections and tighten them further if necessary. If the leaks persist, consider replacing the P-trap or drainpipe components.
Advanced Troubleshooting: When to Call a Plumber
While many sink leaks can be fixed with DIY methods, there are situations where it’s best to call a professional plumber. Here are some signs that you need expert help:
* **Persistent Leaks:** If you’ve tried multiple DIY fixes and the leak persists, it’s likely a sign of a more complex plumbing problem.
* **Corroded Pipes:** Severely corroded pipes may require specialized tools and techniques to repair or replace.
* **Hidden Leaks:** If you suspect a leak behind a wall or under the floor, it’s crucial to call a plumber to avoid extensive water damage.
* **Lack of Experience:** If you’re uncomfortable working with plumbing or unsure about any of the steps involved, it’s always best to err on the side of caution and call a professional.
According to industry reports, homeowners who attempt complex plumbing repairs without proper knowledge or tools often end up causing more damage and incurring higher repair costs. A qualified plumber has the expertise and equipment to diagnose and fix plumbing problems quickly and efficiently, saving you time, money, and stress.
The Role of Professional Plumbing Services in Maintaining Your Sink
Professional plumbing services play a vital role in maintaining the health and longevity of your sink and overall plumbing system. Regular maintenance can help prevent leaks, clogs, and other plumbing problems, saving you money on costly repairs in the long run. Plumbers can perform a variety of services, including:
* **Leak Detection:** Using specialized equipment, plumbers can detect hidden leaks that may be causing water damage or increasing your water bill.
* **Drain Cleaning:** Plumbers can clear clogged drains using snakes, hydro-jetting, or other methods.
* **Pipe Inspection:** Plumbers can inspect your pipes for signs of corrosion, damage, or deterioration.
* **Fixture Installation:** Plumbers can install new faucets, sinks, toilets, and other plumbing fixtures.
* **Water Heater Maintenance:** Plumbers can maintain your water heater to ensure it’s operating efficiently and safely.
Expert Insights on Preventing Future Sink Leaks
Preventing future sink leaks starts with proactive maintenance and careful usage. Here are some expert tips to help you keep your sink leak-free:
* **Regularly Inspect Your Sink:** Check for leaks around the faucet, drain, and supply lines at least once a month. Early detection can prevent minor problems from turning into major headaches.
* **Tighten Loose Connections:** Periodically tighten any loose connections on the faucet, drain, and supply lines. Use a wrench, but be careful not to overtighten.
* **Replace Worn-Out Washers and O-Rings:** Replace worn-out washers and O-rings as soon as you notice them. These small parts can cause significant leaks if they’re not in good condition.
* **Avoid Harsh Chemicals:** Avoid pouring harsh chemicals down the drain, as they can corrode pipes and fittings.
* **Use a Drain Strainer:** Use a drain strainer to catch hair, food scraps, and other debris that can clog the drain.
* **Flush the Drain Regularly:** Flush the drain with hot water and vinegar once a month to help prevent clogs and keep the pipes clean.
* **Protect Pipes from Freezing:** In cold climates, protect your pipes from freezing by insulating them or letting the faucet drip slightly during cold weather.
The Importance of Quality Plumbing Fixtures and Materials
Investing in high-quality plumbing fixtures and materials is crucial for preventing leaks and ensuring the longevity of your plumbing system. Cheap or poorly made fixtures are more likely to leak, corrode, or fail prematurely, leading to costly repairs. When choosing plumbing fixtures and materials, consider the following factors:
* **Material:** Choose fixtures and materials made from durable, corrosion-resistant materials such as brass, stainless steel, or PEX.
* **Brand Reputation:** Opt for reputable brands known for their quality and reliability.
* **Warranty:** Look for fixtures with a good warranty, which can protect you from defects and premature failures.
* **Certifications:** Choose fixtures that are certified by reputable organizations such as the WaterSense program, which ensures water efficiency and performance.
Frequently Asked Questions (Q&A) about Fixing a Leaking Sink
Here are some frequently asked questions about fixing a leaking sink, along with expert answers to help you troubleshoot common problems:
**Q1: How do I know if my sink is leaking?**
A1: Look for signs of water damage, such as dampness, stains, or mold, around the sink, cabinet, or floor. You may also notice a persistent dripping sound or an increase in your water bill.
**Q2: What’s the most common cause of a leaking sink?**
A2: The most common causes of a leaking sink include loose connections, worn-out washers and O-rings, corroded pipes, and damaged fixtures.
**Q3: Can I fix a leaking sink myself, or do I need to call a plumber?**
A3: Many sink leaks can be fixed with DIY methods, but if you’re uncomfortable working with plumbing or if the leak is persistent or complex, it’s best to call a plumber.
**Q4: What tools do I need to fix a leaking sink?**
A4: Essential tools for fixing a leaking sink include a basin wrench, adjustable wrench, pliers, screwdrivers, plumber’s putty, plumber’s tape, and replacement washers and O-rings.
**Q5: How do I turn off the water supply to my sink?**
A5: Locate the shut-off valves under the sink and turn them clockwise to shut off the water. If the shut-off valves are not working, you may need to turn off the main water supply to your house.
**Q6: How do I replace a worn-out washer in a faucet?**
A6: Turn off the water supply, remove the faucet handle, disassemble the faucet to access the washer, replace the old washer with a new one of the same size, and reassemble the faucet.
**Q7: How do I tighten a loose connection on a supply line?**
A7: Use an adjustable wrench to gently tighten the connection at both ends of the supply line. Be careful not to overtighten.
**Q8: How do I apply plumber’s putty to a drain flange?**
A8: Roll a rope of plumber’s putty and press it around the underside of the drain flange. Insert the drain flange into the sink basin and press it firmly into the putty. Tighten the locknut and remove any excess putty.
**Q9: How do I prevent future sink leaks?**
A9: Regularly inspect your sink, tighten loose connections, replace worn-out washers and O-rings, avoid harsh chemicals, use a drain strainer, and flush the drain regularly.
**Q10: What are the signs of a serious plumbing problem that requires a plumber?**
A10: Signs of a serious plumbing problem include persistent leaks, corroded pipes, hidden leaks, and a lack of experience or confidence in DIY plumbing repairs.
Conclusion: Taking Control of Your Leaking Sink Situation
Fixing a leaking sink doesn’t have to be a daunting task. With the right knowledge, tools, and a bit of patience, you can often resolve common sink leaks yourself, saving time and money. Remember to prioritize safety, follow the steps carefully, and don’t hesitate to seek professional help when needed. By understanding the anatomy of your sink, performing regular maintenance, and addressing leaks promptly, you can keep your sink in good working order and prevent future problems. Whether you’re a seasoned DIY enthusiast or a first-time homeowner, this guide has provided you with the essential information and practical tips to confidently tackle the challenge of fixing a leaking sink. Now, it’s time to put your newfound knowledge into action and reclaim your peaceful, drip-free home. We encourage you to share your experiences and any additional tips you may have in the comments below. For more in-depth plumbing advice and expert assistance, explore our comprehensive range of resources and services designed to empower you with the knowledge and support you need for all your home maintenance needs.
